Getting Started With Metasocial
Introduction
Social media management can be overwhelming with so many platforms to manage. Metasocial makes it easy by allowing you to automate posts across multiple platforms, saving you time and helping you build your brand more efficiently. This guide will walk you through the steps to get started with Metasocial so you can take control of your social media efforts in just a few simple steps.
You are just 9 easy steps away from a better way to manage your social media. Open your Metasocial account in another tab and follow along.
In This Article
- Register Metasocial Account
- Connect Social Accounts
- Set Up Posting Schedules
- Create Your First Post
- Visualise the Posting Queue With Calendar
- See What Works With Analytics
- Invite Team Members
- Go Mobile With Apps and Extensions
- Other Great Features
Register Metasocial Account
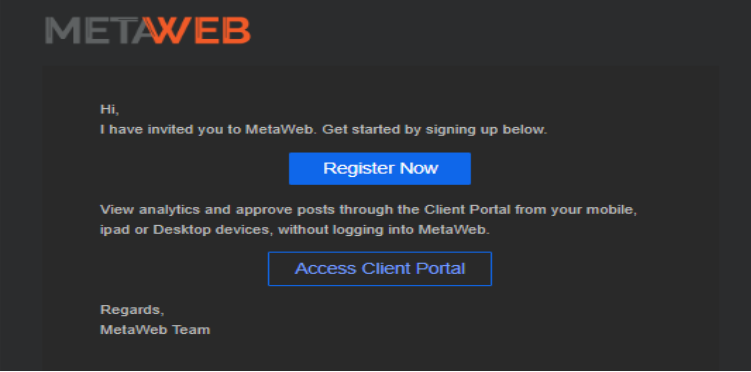
After you are invited to join Metasocial, you will receive a registration email from the platform.
Steps to Register:
- Open the invitation email sent from Metaweb.
- Click on the Register link provided in the email.
- You will be redirected to the Metasocial registration page.
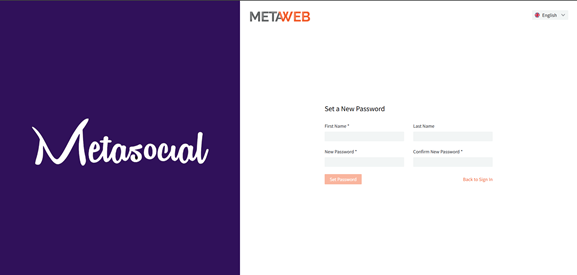
- Fill in the required details such as your name and password.
- Confirm your password and complete the registration.
- Once registered, use your email and password to log in to your Metasocial account.
Note:
- The registration link in the email is time-sensitive. Please complete your registration promptly.
- If you do not see the email in your inbox, check your Spam/Junk folder.
Connect Social Accounts
The first step to using Metasocial is to connect your social media profiles to Metasocial.
1. Click Accounts → Connect Account to connect one of the profiles listed below:
– Facebook: Page, Group
– Twitter: Profile
– LinkedIn: Profile, Page
– Pinterest: Board
– Instagram: Profile, Business (Professional)
– YouTube: Channel
– Tumblr: Blog
– Threads: Profile
– Google Business Profile: Chain Locations
– TikTok: Profile
– Bluesky: Profile
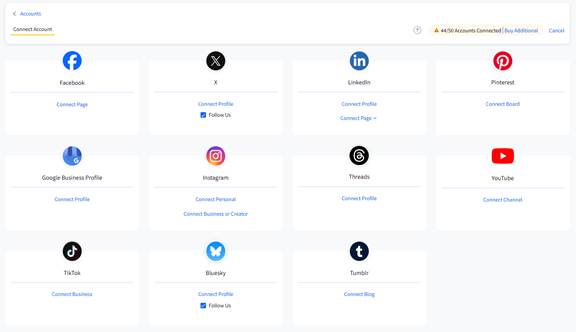
2. Once you click on the Connect button, you will be redirected to the social media platform and asked for authorisation.
3. Accept all permissions to continue.
Set Up Publishing Schedules
Once your accounts have been connected to Metasocial, you can manage your scheduled publishing by creating posting schedules. Posts added to your queue will be automatically scheduled during the next available time slot according to the posting schedule you have set up. Follow these steps to establish your posting schedule:
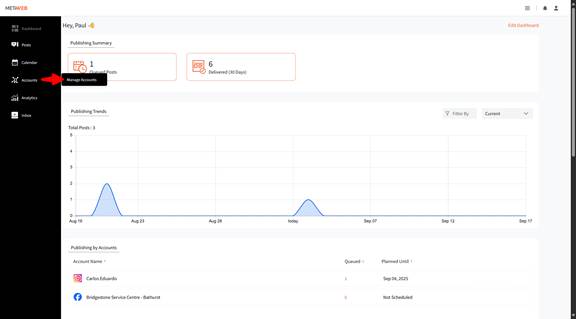
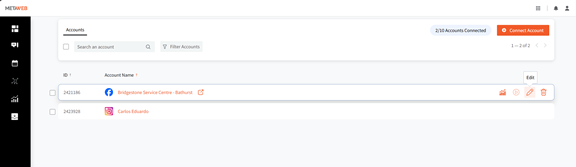
1. Go to Accounts → Manage Accounts.
2. Select the social account for which you want to define a posting schedule.
3. Set time slots for posting by adding time in the given field, selecting the days which you want to assign it, and clicking on Add.
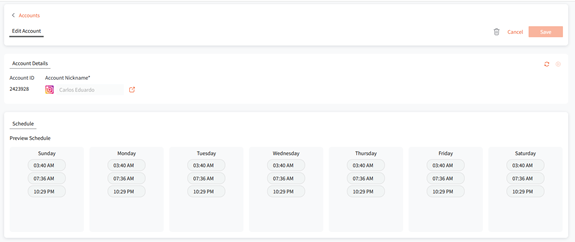
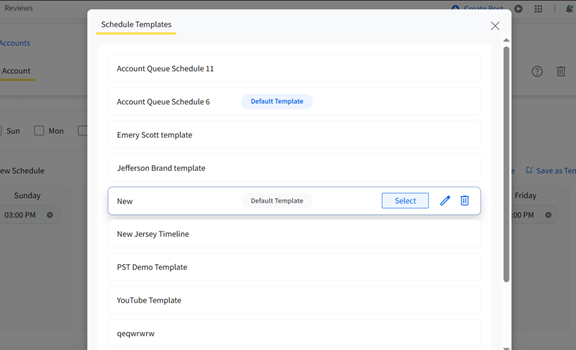
4. You can also click on Select from Templates to customise your scheduling time slots with a simple click.
5. Once you have added all the timings you want for each day, click the Save button.
Your posts are now scheduled and will be automatically published at the designated times.
Create Your First Post
Metasocial seamlessly schedules and publishes to your connected social media profiles. Posts can be made to individual social media accounts or to multiple accounts all at once.
Now, here’s the step-wise description of creating a post with Metasocial:
1. To create a new post, click Posts → Create Post.
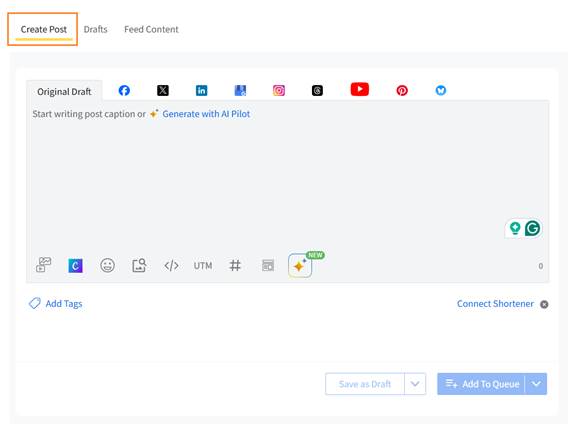
2. Add a link or media (up to 4 images or 1 video) from your computer, Google Drive, Dropbox, or Box.
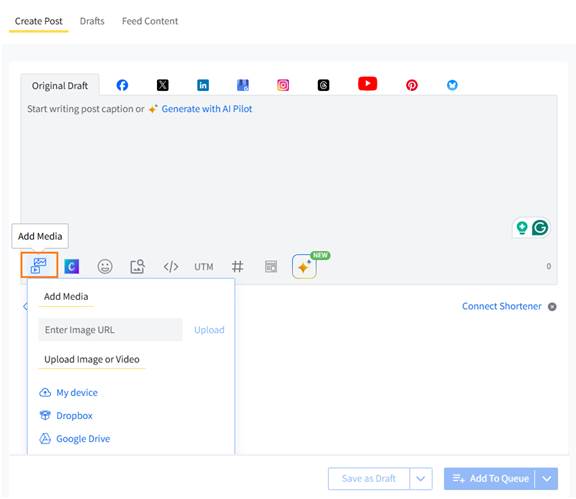
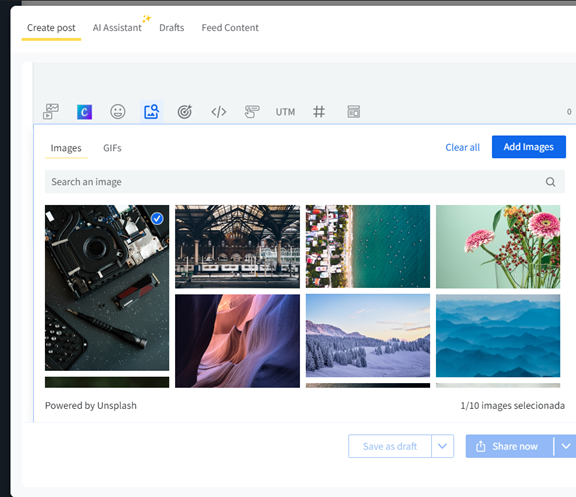
3. You can get images from Unsplash. Simply click on the Add media from an external source button and search for a suitable image by typing a term in the search bar, selecting the image, and clicking on Add Image.
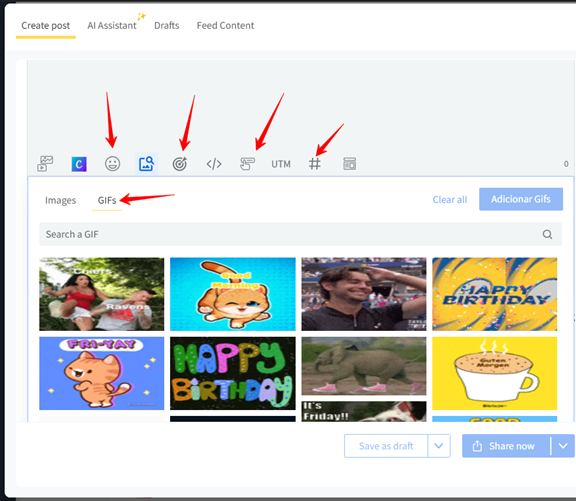
4. Customise your post with GIFs, emojis, hashtags, audience targeting, and location tags.
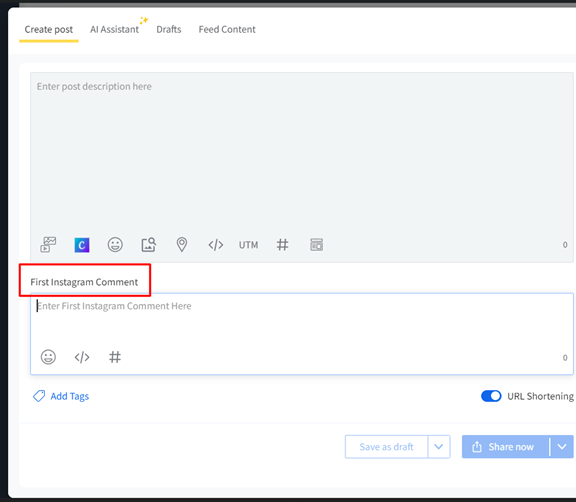
5. Add a First Comment for Instagram, Facebook, and LinkedIn if needed.
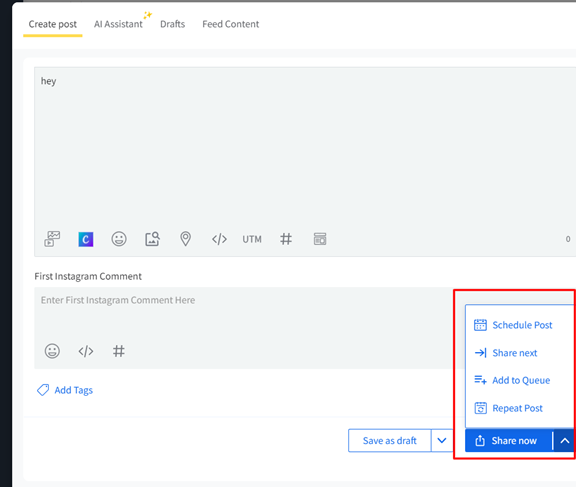
6. Once ready, click Add to Queue to schedule the post. Alternatively, choose one of the following options:
– Share Now: Publish immediately.
– Share Next: Publish in the next available time slot.
– Schedule Post: Set a specific date and time for the post.
– Repeat Post: Repeat the post across selected times and dates.
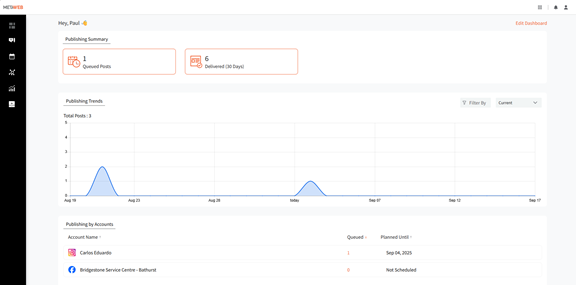
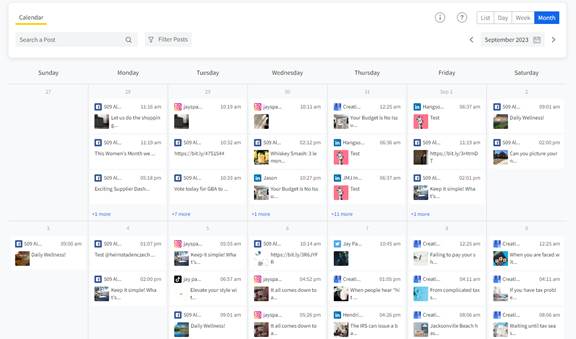
Visualise the Posting Queue With Calendar
The Content Calendar is a dynamic dashboard that helps you track your scheduled content and reschedule posts easily. You can filter the view of the calendar, create posts, and more.
– Click Posts → Calendar to view your scheduled posts.
– Drag and drop scheduled posts to reschedule them without manually changing the time and date fields.
Other Great Features
– Create Groups: If you want to create and share content over the same set of social media accounts regularly, and you don’t want to select the accounts individually each time, you can create groups of accounts to easily queue posts with a single click.
– Social Inbox: Reply to and manage all messages, posts, and comments on all your Facebook Pages and Instagram accounts – in one place.
Conclusion
Awesome, you are all set now! Welcome to Metasocial, the future of social media management!